
Rotary Tiller Blades: L vs C vs J Types, 5 Wear Signs and How to Replace Them
Rotary tiller blades do all the real work on a rotavator: they cut, lift and throw the soil hundreds of times a minute. When the blades are the wrong type, worn or fitted in the wrong pattern, the machine pulls harder, burns more fuel and leaves a rough seedbed. This guide explains the L, C and J blade types, shows the five signs that rotavator blades need changing and walks you through tiller blade replacement step by step.
Need spare blades? Send your tiller model, working width and a photo of one blade on WhatsApp +86 133 8469 2372 or and we will match the right set.
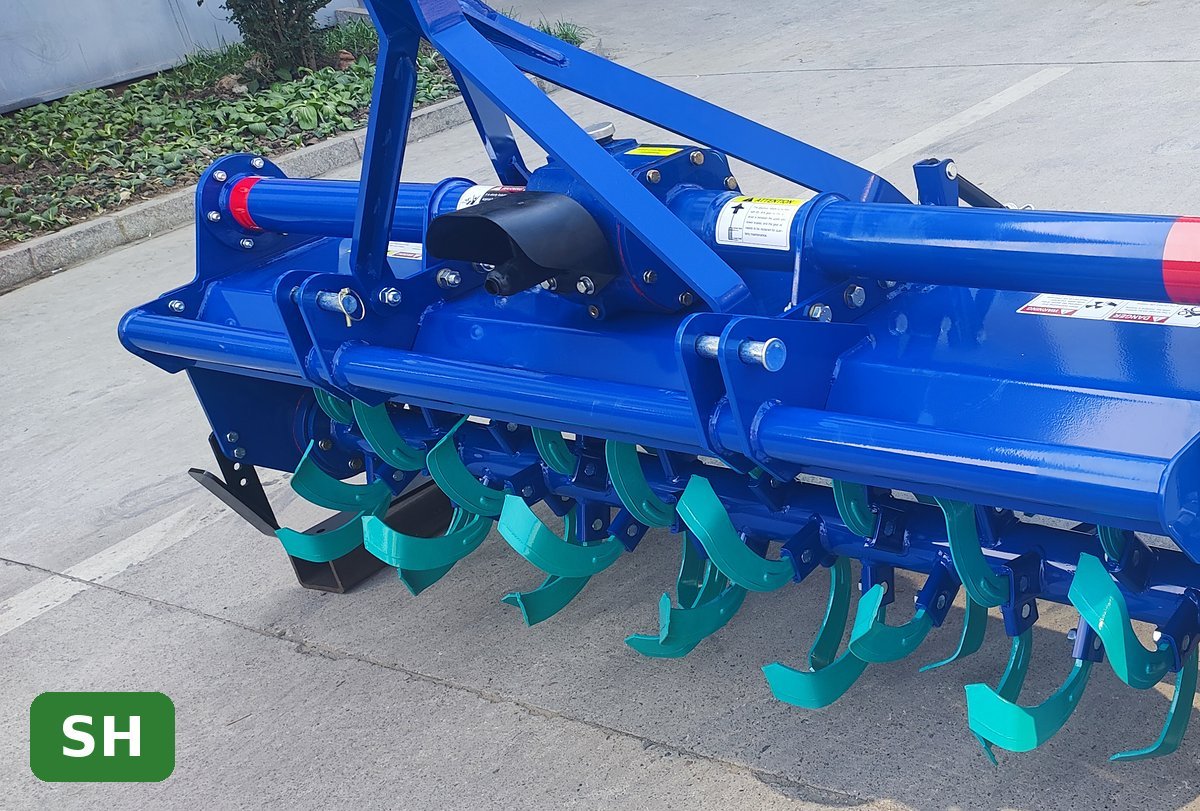
What Rotary Tiller Blades Do
A tractor rotary tiller has a horizontal rotor shaft driven by the PTO through a gearbox. Flanges are welded along the shaft, and each flange carries several blades bolted at different angles. As the rotor spins at roughly 200–235 r/min on our R1SH series, every blade slices a thin strip of soil, lifts it and throws it against the rear shield, where clods break up.
Because rotary tiller blades hit the ground continuously, they are the main wear part on the machine. Good blades keep a sharp cutting edge, resist bending when they hit stones and do not crack in hard, dry soil. That depends on the steel, the heat treatment and the shape.
L Type Blade vs C Type vs J Type: Which Shape Do You Need?
There are three common blade shapes. Most tractor rotavators leave the factory with the L type blade, but the other two have their place.
| Blade type | Shape | Best for | Limitations |
|---|---|---|---|
| L type blade | Straight shank with a bent cutting tip | Most soils, crop residue, general seedbed work on tractor tillers | Wears faster in very stony ground |
| C type blade | Curved, sickle-like profile | Wet, sticky soil and paddy fields; small tillers and walking tractors | Shallower cut, less effective on hard dry ground |
| J type blade | Hook-shaped with a long bend | Fine tilth in light, loose soil; mixing in residue | Less common; can wrap straw in heavy residue |
If you are unsure, keep the blade shape the machine was designed for. The flange holes, bolt size and rotor radius are matched to that blade, and a different type can change the working depth and balance.
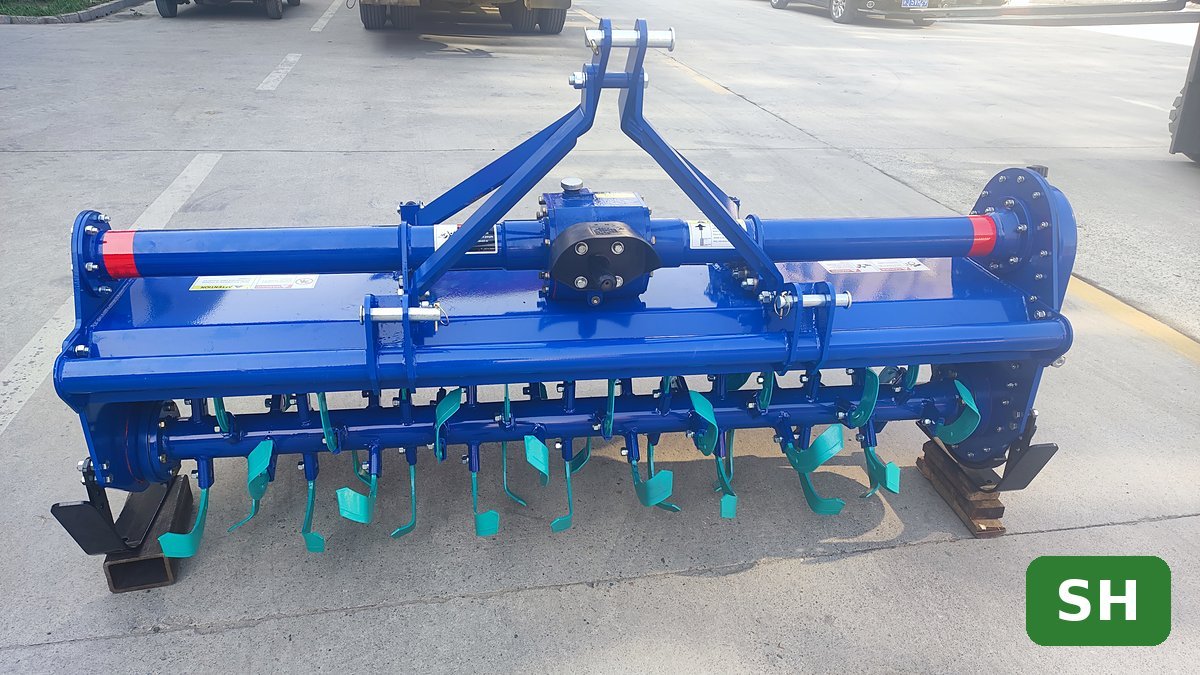
How Many Rotary Tiller Blades Does a Machine Need?
The number of blades rises with working width. On our rotary tillers it runs from 24 to 70:
| Model | Working width (cm) | No. of blades | Matching power (hp) |
|---|---|---|---|
| R1SH-120 | 120 | 24 | 20–25 |
| R1SH-150 | 150 | 34 | 30–45 |
| R1SH-180 | 180 | 50 | 50–55 |
| R1SH-200 | 200 | 58 | 60–65 |
| R1SH-220 | 220 | 62 | 65–80 |
| R1SH-250 | 250 | 70 | >100 |
More blades give a finer finish; fewer blades clear sticky soil and heavy residue better. When you order a spare set, order the full count for your width plus a few extra, and the same number of new bolts and nuts.
5 Signs Your Rotavator Blades Need Replacing
Check the rotary tiller blades every 50 working hours, and before every new season.
- Rounded or short tips. Compare a worn blade with a new one. When the tip has lost about a third of its length or the edge is rounded, the blade pushes soil instead of cutting it.
- Shallower working depth. If you have to lower the machine further each week to reach the same depth, the blades are getting shorter.
- Higher fuel use and engine load. Blunt blades need more power; the tractor slows down in ground it used to work easily.
- Bent or cracked blades. A bent blade throws the rotor out of balance and causes vibration that damages bearings and the gearbox.
- Rough, cloddy finish. When the same settings suddenly leave bigger clods and uneven strips, check the blades before changing the speed or shield.
Tiller Blade Replacement: Step by Step
A full tiller blade replacement on a 1.8 m machine takes two people about two to three hours with basic tools.
- Make it safe. Lower the tiller onto blocks, stop the engine, remove the key and disconnect the PTO shaft.
- Note the pattern. Take a photo of the rotor before you start. The blades are set in a spiral, with left-hand and right-hand blades alternating, so the rotor enters the soil one blade at a time.
- Work one flange at a time. Remove and replace the blades on one flange before moving to the next, so you always have a reference.
- Use new bolts. Blade bolts stretch and wear. Fit new high-tensile bolts with lock nuts and tighten them firmly.
- Replace in pairs. If you change only a few blades, replace them in pairs on opposite sides of the rotor to keep it balanced.
- Check and re-tighten. Turn the rotor by hand to check clearance, then re-tighten all bolts after the first few hours of work.
The full blade set is the cheapest rotary tiller spare parts you can buy compared with the damage worn blades cause. A gearbox or rotor bearing costs far more than a new set of blades.
Choosing Quality Rotary Tiller Spare Parts
Not all rotary tiller blades are equal. When you buy rotary tiller spare parts, check these points:
- Steel and hardness. Heat-treated spring steel, such as 65Mn, is commonly used. A properly hardened blade holds its edge but still bends a little instead of snapping on a stone.
- Hole position and size. Measure the distance between the bolt holes and their diameter on your old blade. A few millimetres out and the blade will not sit tight on the flange.
- Left and right hand. Order the correct mix of left and right blades for your rotor.
- Thickness and width. Thicker blades last longer but need more power; follow the original size.
- Finish. Paint or coating protects against rust in storage, which matters for dealers who keep stock.
For the same reasons we explain in our guide to harrow disc heat treatment, quenching and tempering decide how long a soil-engaging part lasts.
How to Make Rotary Tiller Blades Last Longer
- Do not lower the tiller onto the ground while the rotor is turning at full speed; engage the PTO with the machine slightly raised.
- Avoid very wet soil, which sticks to the blades and smears the ground.
- In stony fields, work a little shallower and slower.
- Clear wrapped straw and wire from the rotor at the end of each day.
- Clean and oil the rotavator blades before storing the machine under cover.
If your soil is too hard for the blades, loosen it first with a plough or break the hard pan with a subsoiler. Our rotary tiller buying guide explains how to match width and horsepower so the blades are not overloaded.
Good tillage practice protects your soil as well as your machine. The FAO’s work on sustainable agricultural mechanization explains how fewer, well-planned passes save fuel and soil structure.
Dealer or farm with several tillers? Send the models and quantities on WhatsApp +86 133 8469 2372 or and we will quote blades and bolts together.
FAQ
How often should rotary tiller blades be replaced?
It depends on soil and hours. In sandy or stony soil blades may need changing every season; in soft loam they can last several seasons. Replace them when the tips are badly worn or the depth drops.
Can I fit C type blades on a tiller made for L type blades?
Only if the bolt holes and length match. Even then the working depth and finish change, so it is usually best to keep the original type.
Why does my rotavator vibrate after changing blades?
The blades are probably in the wrong pattern, or left and right blades are mixed up. Check against the photo you took and the original arrangement.
Do you sell rotary tiller blades separately?
Yes. We supply rotary tiller spare parts, including blade sets and bolts for our tillers, and dealers can order them with each machine.
Get a Quote
Send us:
- Your tiller model and working width
- The blade type (L, C or J) and a photo with measurements
- The number of sets you need
- Your destination port
Message us on WhatsApp +86 133 8469 2372 or browse all models on our rotary tillers page.
ความคิดเห็น
โปรดเข้าสู่ระบบเพื่อร่วมสนทนา เข้าสู่ระบบ สมัครสมาชิก